วันจันทร์, พฤศจิกายน 28, 2554

Make Classic looks on Ubuntu 10, 11, 12 more beautiful

First:

Revert to Ubuntu Classic
http://askubuntu.com/questions/58172/how-to-revert-to-gnome-classic

Install
  • Gnome Shell
  • Gnome Tweak Tool

Change the theme to Adwaita...


It will look ugly, well we will try gnome 3 theme

Use WebUpd8 PPA - we will find a lot of gnome3 shell extension here

https://launchpad.net/~webupd8team/+archive/gnome3

$ sudo add-apt-repository ppa:webupd8team/gnome3

Use new theme;

my number one :)
Adwaita Cupertino


http://gnome-look.org/content/show.php/?content=147061
   This is just GTK theme, there's no gnome-shell theme. so use gnome-shell theme from below source.

This Zukitwo Cupertino 
    This will fullfill the beauty of the Adwaita Cupertino (additional Gnome Shell theme)
http://gnome-look.org/content/show.php?content=149412

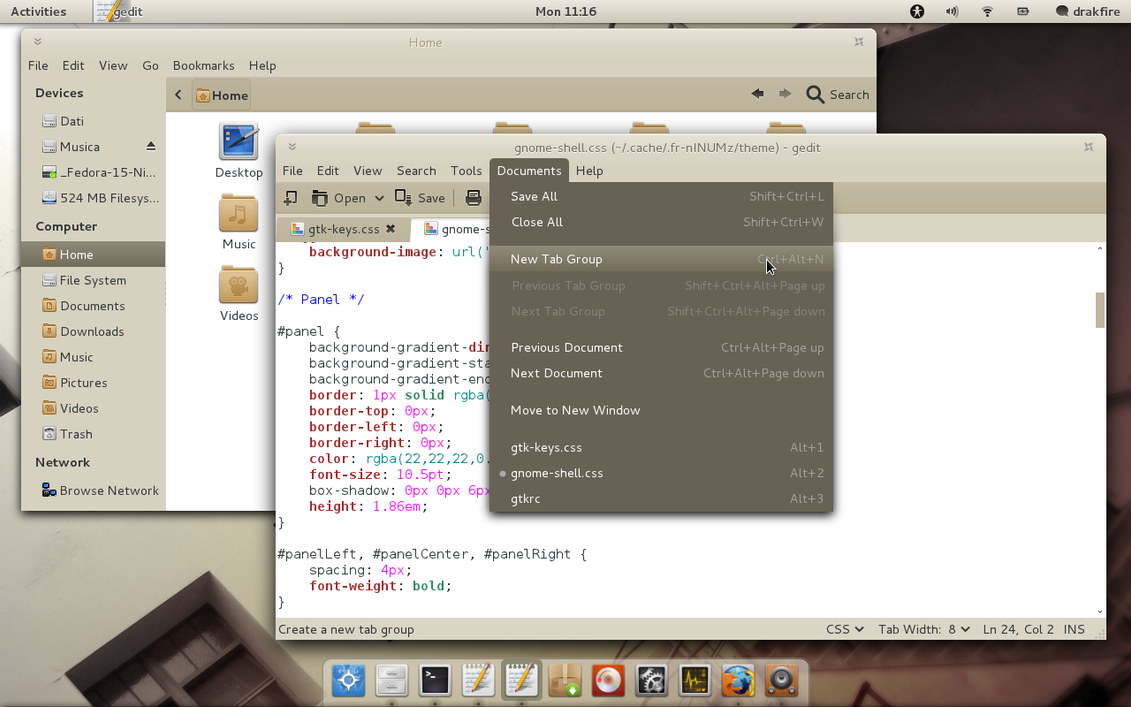
Drafire Caffe GTK 3 theme


http://drakfire86.deviantart.com/gallery/#/d3etzpd

Use new icon; Faenza Icons


http://tiheum.deviantart.com/art/Faenza-Icons-173323228
 

Plus Icon in blue color more feels like OSX 

Faenza cupertino
    http://gnome-look.org/content/show.php/Faenza-Cupertino?content=129008.


This is require base Faenza package.
 

วันศุกร์, กันยายน 02, 2554

tar everything except the files (or some of files)

Using this command when want to tar everything in a folder except some of the files (binary files)


# tar -cjvf ../packed_no_bin.tar.bz2 * --exclude=*.gz --exclude=*.bin --exclude=*.rpm

if there's another file type that didn't want to tar just put another
--exclude=<pattern>

วันอังคาร, สิงหาคม 30, 2554

SSH Problem: REMOTE HOST IDENTIFICATION HAS CHANGED

How to fix "REMOTE HOST IDENTIFICATION HAS CHANGED"

by execute this command

# ssh-keygen -f "<home path>/.ssh/known_hosts" -R <IP address that going to connect>

Example:
    ssh-keygen -f "/root/.ssh/known_hosts" -R 192.168.1.85

When try to connect again this time it will ask to accept a new fingerprint.

Use this solution at your own risk ;)

วันพฤหัสบดี, สิงหาคม 18, 2554

Clonezilla problem: Clonzilla DVD boot media did not mount from DVD itself

Clonezilla problem: Clonzilla DVD boot media did not mount from DVD itself 
(always mount Flashdrive if there're Clonezilla boot media in both Flashdrive & CDROM)

    I have to remotely do Clonezilla imaging & restoration via iLO. There's no one standby to put in/put out the media from the server for me.

The situation was like this:

 1. have Clonezilla boot media in a Flashdrive, plugged in for making&keeping a clonezilla image.
2. have Clonzilla DVD boot media in a drive. There's a image which made by other and want to restore at this machine.


  • Reboot the machine 
  • Select to boot from DVD-ROM
  • It's booted
  • Select the default, 1st option
  • Clonezilla mount /home/partimag from a Flashdrive instead of a DVD.
How to solve:
  • When at Clonezilla boot option screen select to load Clonezilla to RAM
  • It's only load the program into a ramdisk.
  • then manually mount DVD-ROM to be /home/partimag
  • first; sudo -s to became root 
  • mount a dvd drive
    # mkdir -p /media/cdrom
    # mount /dev/sr0 /media/cdrom 
  • /home/partimag which Clonezilla will use to find their image files will be a symbolic link to /live/image//home/partimag (which is currently is a ram disk)
  • delete it
    # rm /home/partimag
  • create a new symbolic link point to mounted DVD disc instead
    # ln -s /media/cdrom/home/partimag /home/partimag
  • Done! now execute the Clonezilla program
    # clonezilla
  • When it ask the repository of images choose skip (the current /home/partimag)

reference:
Got an idea from
http://asecurepc.com/Ubuntu%20Tutorials/Clonezilla.html

วันจันทร์, สิงหาคม 01, 2554

Ubuntu: Fix can't authenticate/ authenticate window always shake and can't type a password | gnome-keyring-daemon error

Howto fix can't authenticate/authenticate window always shake and can't type a password
   I was painful (& nearly re-install the Ubuntu; Natty) with this problem more than one month, trying to find what is cause this problem.

    The problem is when you open/use an application which need an authentication (a authentication window pop-up) the window just opened and shake shake, say that your password was not correct but you didn't have chance to input any password.


 This screenshot I took by quickly press PrtScn button.

    We can found the error message of this error in /var/log/auth.log. message look like this "...gnome-keyring-daemon[1423]: couldn't allocate secure memory to keep passwords and or keys from being written to the disk..".

Solution: 
Need to change a following file's permission: /usr/lib/policykit-1/polkit-agent-helper-1
by execute this command in a terminal.

sudo chmod +s /usr/lib/policykit-1/polkit-agent-helper-1

found from > http://ubuntuforums.org/showpost.php?p=10620872&postcount=9

วันอังคาร, กรกฎาคม 26, 2554

Using sed command to search and replace IP address 

" If your version of sed supports extended regular expressions (the -r option), you could do something like this (which is similar to what you have in your grep statement). Also note $newip is outside the single quotes to allow the shell to replace it.

sed -r 's/(\b[0-9]{1,3}\.){3}[0-9]{1,3}\b'/$newip/

BTW this solution still matches strings that do not represent IP addresses. See this site under IP Adresses for more complex solutions."
 มีข้อเสียคือมัน replace pattern เลข.เลข.เลข.เลข ไม่ได้สนใจว่าเป็น IP address ที่ถูกต้องหรือไม่

from: StackOverflow using-sed-to-search-and-replace-an-ip-address-in-a-file

วันจันทร์, กรกฎาคม 25, 2554

Browse internet anonymously with Ubuntu (free yourself from limited network)

Browse internet anonymously with Ubuntu (free yourself from limited network)

1. Open a terminal then execute the command (leave it during your internet surfing)

#ssh -ND 9999 username@home_router_ip_address

i.e.: ssh -ND 9999 daho@homeip_addr

2. Open the proxy setting (gnome proxy settings or Firefox proxy setting)

input only address of socks v5 proxy
127.0.0.1 port 9999

input none and port 0 to the others


original post:
http://www.searchmarked.com/ubuntu/how-to-surf-anonymously-using-an-ssh-tunnel-and-ubuntu.php

More options of SSH Tunneling
https://help.ubuntu.com/community/SSH/OpenSSH/PortForwarding

วันอังคาร, พฤษภาคม 03, 2554

Ubuntu/linux: Speedup SCP file transfer


put additional argument into scp command line

scp -c arcfour filename.txt host:/path/filename

"Overall arcfour performed better than any other cypher used. It is safe to say thatar cfo ur can be
used to transfer files usingscp on an internal network.
You can define which cypher to use by-c option of scp ."

วันศุกร์, เมษายน 29, 2554

Ubuntu Natty 11.04 x64 - Change Firefox JRE plugin from IcedTea to Sun & Flash plugins Npwrapper to Adobe Flash 10

Prerequisted
Download adobe flash 10 for x64 in tar.gz distribution (can't remember from which url, try googling)
Install Sun's JDK as a default JDK.

For Java plugin/JRE
  • going to .mozilla/plugins/
  • find the libjavaplugin.so
  • using ls -la to see its symbolic link  to /etc/alternatives/mozilla-javaplugin.so
  • and /etc/alternatives/mozilla-javaplugin.so also a synbolic link to another place, which is IcedTea's JRE 
  • So we just change /etc/alternatives/mozilla-javaplugin.so point to /usr/lib/jvm/jdk1.6.0_25/jre/lib/amd64/libnpjp2.so 
 * If there's no .mozilla/plugins/ you might want to check this blog instead. To "Change Firefox java plugin from IcedTeaWeb to Sun JRE"

execute at terminal:
    sudo apt-get install icedtea-7-plugin

For Adobe Flash
  • type about:plugins in the address bar
  • find the default Flash plugins remember its path of the .so file
  • mine was point to /var/lib/flashplugin-installer/libflashplayer.so
  • going there  /var/lib/flashplugin-installer/
  • rename npwrapper.libflashplayer.so to npwrapper.libflashplayer.so.bak
  • put the downloaded libflashplayer.so into this folder
  • chmod 777 libflashplayer.so
  • restart Firefox
  • Bingo! 
  • check by enter about:plugins in the address bar
*find my post about howto make a download Sun's JDK to a default JDK

วันพฤหัสบดี, เมษายน 28, 2554

Ubuntu: install Sun's JDK as a default JDK runtime on Natty-11.04


# cd /usr/lib/jvm
# chmod u+x ~/jdk-6u25-linux-x64.bin
# sudo -s 
# ~/jdk-6u25-linux-x64.bin
press spacebar until saw the question, answer yes, extraction begin
# sudo update-alternatives --install "/usr/bin/java" "java" "/usr/lib/jvm/jdk1.6.0_25/bin/java" 1
# sudo update-alternatives --config java

select choice that have path /usr/lib/jvm/jdk1.6.0_25/bin/java; should be choice 1
now test in Terminal
# java -version
java version "1.6.0_25"
Java(TM) SE Runtime Environment (build 1.6.0_25-b06)
Java HotSpot(TM) 64-Bit Server VM (build 20.0-b11, mixed mode)


JDK download: http://www.oracle.com/technetwork/java/javase/downloads/index.html

reference: http://www.64bitjungle.com/ubuntu/install-java-jre-160-update-x-on-hardy-as-the-default-java-runtime/

วันอังคาร, เมษายน 26, 2554

Ubuntu: Modify AWN to show Chrome's app dock icons more precisely.

When make a shortcut to Chrome application on AWN dock. the icon didnot change to their favicon or our customized icon.

    This is how to do that :-
i.e.:
chromium-browser --user-data-dir=~/.gmail --app=http://www.gmail.com --class=Gmail $*

Explanation
chromium-browser < Chrome executable >
--user-data-dir="< data directory for an app (linuz's) usually is $HOME/.config/google-chrome >"
--app="< URL of an app e.g.: https://docs.google.com/#home" >"
--class="< Name that make this shortcut unique e.g.: Docs $* >"

e.g.:
/usr/bin/chromium-browser --user-data-dir="/home/xample/.config/google-chrome/Default" --app="https://docs.google.com/#home" --class="Docs $*"

วันศุกร์, เมษายน 22, 2554

Ubuntu: Cleaning (your home made/apt-mirror) ubuntu's mirror

    After config apt-mirror to mirroring the Ubuntu Natty 11.04 my office's Ubuntu repository got seriously  out of disk spaces.
PS: my repository use 500GB HDD.
    So, after talk with the college we decided to remove oldest released from our repository; Hardy (8.04 LTS) and Jaunty (9.04).

To cleanup the repository:
- edit the /etc/apt/mirror.list
$ sudo vim /etc/apt/mirror.list
- remove or remark all lines that have word hardy or jaunty (to tell apt-mirror not to download their files or we did not want them anymore :P )
- save changed
- use command (command I got from their configuration file.)
$ sudo /var/spool/apt-mirror/var/clean.sh 

Notice/learn from apt-mirror config file
...
############# config ##################
#
set base_path /var/spool/apt-mirror
#
# if you change the base path you must create the directories below with write privlages
#
set mirror_path $base_path/mirror
set skel_path $base_path/skel
set var_path $base_path/var
set cleanscript $var_path/clean.sh

...

- after execute clean command, let's it do its work.
- you will get your free space back soon.

วันศุกร์, เมษายน 08, 2554

วันพุธ, มีนาคม 09, 2554

How-To Find the IP Address in used in the network (ip scanner) in Ubuntu

In ubuntu I want to find the used IP address, want to find who is use prohibited static IP address.

$sudo apt-get install nmap

Just that :) then

Here's the sample command line:-

IP Scanning with range 192.168.0.0 – 192.168.0.255
$ sudo nmap -sP 192.168.0.0/24

IP Scanning with range 192.168.0.1 – 192.168.0.254
$ sudo nmap -sP 192.168.0.1-254

Port Scanning with range port 100 – port 139
$ nmap 192.168.0.3 -p100-139

Scanning Operating system on target IP
$ sudo nmap -O 192.168.0.3

nmap Faster Execution
If you want to make faster scan, use -T4 option on nmap command..
$ sudo nmap -A -T4 192.168.0.3


reference: http://taufanlubis.wordpress.com/2007/10/20/ip-and-port-scanning-using-nmap-network-mapper-in-ubuntu/

วันอังคาร, มีนาคม 08, 2554

Shrink/Compress a VirtualBox Windows Guest Machine

Window guest image file (.vdi) eaten up the hard disk space. Check inside the Window guest; there're much of free spaces, didn't took so much of spaces as allocated on the host machines.
  So, I got bad mood!, my HDD's spaces was running out -_-" then I found this article "Shrink/Compress a VirtualBox Windows Guest Machine" (find the link at the bottom of the post)

  1. Open the window guest 
  2. Then use SDelete, small utility from MS themself.
    1. extract sdelete into windows directory
    2. open the command line terminal
    3. execute sdelete -c
    4. follow on-screen instruction
  3. close the VM
  4. use VBManage command to compact the vdi file
    1. VBoxManage modifyhd  .vdi --compact
  5. Hooray! :D

reference:
1 from http://r3dux.org/2010/10/how-to-shrinkcompress-a-virtualbox-windows-guest-machine/
2  VirtualBox help
  • With the --compact option, can be used to compact disk images, i.e. remove blocks that only contains zeroes. This will shrink a dynamically expanding image again; it will reduce the physical size of the image without affecting the logical size of the virtual disk. Compaction works both for base images and for diff images created as part of a snapshot. For this operation to be effective, it is required that free space in the guest system first be zeroed out using a suitable software tool. For Windows guests, you can use the sdelete tool provided by Microsoft. Execute sdelete -c in the guest to zero the free disk space before compressing the virtual disk image. Please note that compacting is currently only available for VDI images. A similar effect can be achieved by zeroing out free blocks and then cloning the disk to any other dynamically expanding format. You can use this workaround until compacting is also supported for disk formats other than VDI.

วันพฤหัสบดี, มีนาคม 03, 2554

HOWTO Configure SSH for passwordless logins

HOWTO Configure SSH for Passwordless Logins (Succeed/Tested on Ubuntu)
Do these on client pc (machine that will make a connection to a remote server)

Step 1 - 
$ ssh-keygen -t rsa
Note: Enter when it asking for the passphrase

Step 2
$ ssh-keygen -N '' -f ~/.ssh/id_dsa

Step 3
$ ssh-copy-id [remote-server]
i.e.: ssh-copy-id root@172.16.0.88

Step 4
$ ssh [remote-server] 'chmod 700 .ssh'
i.e.: ssh root@172.16.0.88 'chmod 700 .ssh'

Step 5
Test connecting..it will not ask for password anymore 
$ ssh [remote-server]
ssh root@172.16.0.88

    I have more than a server for this pc to make the connection so I repeat step 3 thru step 5 for each remote machines. Don't need to repeat step 1, 2 and don't do that.


from http://fak3r.com/geek/howto-build-your-own-open-source-dropbox-clone/ 

วันพุธ, มีนาคม 02, 2554

Calibre server; howto sync repository between local & remote server


  1. Install calibre in desktop pc, building my ebooks library
  2. Move default Calibre's repository to another place i.e.: calibre-repo
  3. Add the books as much as you want.
  4. Copy folder calibre-repo to the a remote server
  5. Use rsync program to synchronize the repository between a desktop (which always add a new book from here) and the remote server

    Command line

    To sync/copy the refresh repository data to the remote 

    rsync -r -a -v -e "ssh -l " :/remote/path /local/path

  6. On remote server I'm starting calibre server with this command
    calibre-server --daemonize --auto-reload --pidfile=$HOME/calibre.pid --port=8012 --with-library=$HOME/calibre-repos
    headless start, background process no need the GUI environment.
  7. After first deployment, whenever I want to update the remote's repository I will execute the command in #5
  8. For sure, I will restart the calibre process;(#6)
  9. To restart the calibre process use
     kill -9 `cat HOME/calibre.pid`
    then execute the command in #6 again


Reference: 


$rsync -r -a -v -e "ssh -l " --delete :/remote/path /local/path

from: http://www.cyberciti.biz/tips/linux-use-rsync-transfer-mirror-files-directories.html


$rsync -avz --stats  /tmp/dir1/ /tmp/dir2

from: http://www.unixtutorial.org/2008/09/how-to-synchronize-directories-with-rsync/

วันจันทร์, กุมภาพันธ์ 28, 2554

Config WebSphere Application Server for Developers on Ubuntu

HOWTO config WebSphere Application Server for Developers v.7.0 on Ubuntu 10.10


Config JVM (a.k.a -Xms -Xmx parameter)

Go to (Left pane)
    Servers > WebSphere application servers

Select a server, in table on right pane
  click server1

Find Server Infrastructure under the Configuration tab.

   click Server Infrastructure > Java and Process Management Process definitionAdditional PropertiesJava Virtual Machine

I was change to following value :-  
    Initial heap size  = 512MB (-Xms)
    Maximum heap size 
 = 512MB (-Xmx)

If you want to put some jvm arguments such as -javaagent, we can put into this box 
Generic JVM arguments 

    Click OK button (on bottom of this section) to save the configuration, and also don't forget to confirm the changed by click on Save master configuration on top of the right pane (appeared after you click OK/Apply button)

We might restart the WAS for the change to take effects.

วันศุกร์, กุมภาพันธ์ 25, 2554

Finding cause of OutOfMemoryError in WebSphere 7.0 on Ubuntu 10.10

HOWTO find cause of OutOfMemoryError in WebSphere for Developer 7.0 on Ubuntu 10.10


IBM suggest to enable the verbose gabage collector option and use the MustGather software.
HOWTO Enabling verbosegc on releases of Version 7.0 - Application Servers


  • In the Administrative Console, expand Servers, expand Server Types, and then click WebSphere application servers.
  • Click on the server that you would like to work with, for example, server1.
  • On the Configuration tab, under Server Infrastructure, expand Java and Process Management, and click Process Definition.
  • Under the Additional Properties section, click Java Virtual Machine.
  • Check the Verbose Garbage Collection check box.
  • Apply and Save the changes.
  • Restart the Application Server for the changes to take effect.

Free Up memory in Ubuntu

HOWTO free Up memory in Ubuntu

When you close almost every application but information from 'free' command still report a hugh number of memory consumed. Try this method ;)

echo 3 > /proc/sys/vm/drop_caches

I'm don't know much in detail which this caches was but following command line do free up memory; there're more free memory from the free's report now

Installing WebSphere Application Server for Developers on Ubuntu 10.10

Installing WebSphere Application Server for Developers on Ubuntu 10.10


Download the WAS at 
http://www.ibm.com/developerworks/downloads/ws/wasdevelopers/index.html


There're linux & windows 32bit available. Using Download Director was very convenient. We  can resume the download without the 3rd party download manager software. 
After we got the file: was.cd.7000.wasdev.nocharge.linux.ia32.tar.gz; for Ubuntu


Extract to somewhere under our home directory 
i.e.:
$tar xvf was.cd.7000.wasdev.nocharge.linux.ia32.tar.gz -C ~/Temp 


If there's no Temp folder created. We must create it first
$mkdir ~/Temp


Change to Temp folder
$cd ~/Temp


There's folder named WAS
$cd WAS


Do not execut install command yet, it will struct at  stage 'importConfigArchive'. We must create synbolic link from sh to bash instead. which I'm found information from here:
http://meekgonkey.blogspot.com/2009/07/ubuntu-installing-websphere-7.html


$sudo rm /bin/sh
$sudo ln -s /bin/bash /bin/sh


Now we can start the installation, 
$./install


the default installation directory will be:
/home/[your home]/IBM/WebSphere/AppServer


Follow on screen installer instruction. I'm chosen not to user authentication and not select no other component to install.
Other component is: 

  1. Sample application
  2. non-english package for admin console.
  3. non-english package for application runtime
For configuration, start/stop find more information from