ถ้าเรา google หาวิธีอัพเกรด version ของ subversion จะเจอเยอะแยะ ส่วนนึงก็จะให้ไปเพิ่ม ppa ของ subversion เลย บ้างก็ให้ เพิ่ม repository โดยชี้ไปที่ URL ของตนเอง แต่วิธีที่จะนำเสนอนี้ดูแล้วว่ามันปลอดภัยระดับนึง ผมเลือกใช้ repository ของ Wandisco ซึ่งเค้าทำธุรกิจที่ต้องใช้ subeversion ทำมาหากิน เชื่อใจได้ระดับนึงว่า ของเค้าต้อง stable และมีการ maintenance ด้วย
“The only true wisdom is knowing that you know nothing.”
แสดงบทความที่มีป้ายกำกับ ubuntu แสดงบทความทั้งหมด
แสดงบทความที่มีป้ายกำกับ ubuntu แสดงบทความทั้งหมด
วันศุกร์, เมษายน 22, 2559
วันพฤหัสบดี, กรกฎาคม 16, 2558
ติดหนึบ vi มาใส่สีให้ vi กันเถอะ (Editing file with vi in colors)
ใช้งาน terminal บ่อยๆ เวลาเปิดแก้ไขไฟล์ด้วย vi หรือ vim แล้วมันเป็นสีเดียวกันหมด มันก็ดูลำบาก

อ่อๆ คำสั่งและภาพเป็นการทำบน Ubuntu นะครับ OSX ก็ใช้ได้ น่าจะมีทั้ง vi, git มาแล้วซะด้วยไม่ต้อง download แล้ว
ไม่พูดมากแล้ว เรามาลงมือใส่สีให้ vim กันเลย
เราจะต้องใช้ git client ด้วย ถ้าไม่มีก็ติดตั้งก่อน
$ sudo apt-get install git -y
คนที่ใจดีทำแจกก็นายคนนี้ chriskempson opensource เอาไว้ที่ github
ตัวถาดสีของ vim จริงๆก็มีหลายเจ้าที่ทำเอาไว้ แต่ผมถูกใจของคนนี้ที่สุด ถ้าสนใจจะลองตัวอื่นก็ลอง google ดู vim colors ที่นิยมกันมากๆ ก็มี solarized
อ่าว ถ้าจะใช้ vi แต่ยังไม่มีก็ไม่ได้ใช่มั้ย ติดตั้งก่อน ถ้าเกิดยังไม่ได้ลง
$ sudo apt-get install vim -y
ต่อมาเตรียม directory .vim/colors
$ mkdir -p ~/.vim/colors
change dir เข้าไปเลย
$ cd ~/.vim/colors
ทำการ download ชุดสี base16
$ git clone git://github.com/chriskempson/base16-vim.git base16
ถ้าเอาเร็วก้อ copy มันทุกสีเลย
$ cp base16/colors/*.vim .
หรือ จะเลือกเฉพาะตัวที่ชอบก็ได้ (อย่างผมเอาแค่สองตัวนี้)
$ cp base16/colors/base16-tomorrow.vim .
$ cp base16/colors/base16-google.vim .
แก้ไข ~/.vimrc ถ้าไม่มีก็สร้างซะครับ จะใช้ text editor อะไรก็ได้ ผมใช้ vi นี่แหละ
$ vi ~/.vimrc
เพิ่ม 2 บรรทัดนี้เข้าไป ข้างหลัง colorscheme ก็เลือกเอาตามชื่อไฟล์ที่อยู่ใน base16/colors/ แล้วตัด .vim ออก
set background=dark
colorscheme base16-tomorrow
ณ ตอนนี้มีให้เลือกตามนี้ หรือจะไปดูแบบ online ได้ที่นี่เลย
base16-3024.vim base16-brewer.vim base16-google.vim base16-ocean.vim base16-apathy.vim base16-bright.vim base16-grayscale.vim base16-paraiso.vim base16-ashes.vim base16-chalk.vim base16-greenscreen.vim base16-pop.vim base16-atelierdune.vim base16-codeschool.vim base16-harmonic16.vim base16-railscasts.vim base16-atelierforest.vim base16-colors.vim base16-isotope.vim base16-shapeshifter.vim base16-atelierheath.vim base16-default.vim base16-londontube.vim base16-solarized.vim base16-atelierlakeside.vim base16-eighties.vim base16-marrakesh.vim base16-summerfruit.vim base16-atelierseaside.vim base16-embers.vim base16-mocha.vim base16-tomorrow.vim base16-bespin.vim base16-flat.vim base16-monokai.vim base16-twilight.vim
กด :wq ออกมา ทดลองเรียกใช้งาน vi ใหม่
$ vi ~/.bashrc
ทะด๊า..า


Happy Coding!
วันพุธ, มีนาคม 13, 2556
Ubuntu: วิธีตั้ง proxy server ส่วนตัวด้วย tinyproxy / Setup a personal proxy with tinyproxy
วันนี้นำเสนอการตั้ง proxy ส่วนตัว บน Ubuntu OS แบบง่ายๆด้วย tinyproxy
สถานการณ์ของผม
ไอ้การที่จะเปลี่ยน IP ของเครื่องไปๆมาๆเพื่อออก internet นี่มันไม่สะดวกครับ ผมจึงคิดว่าทำเครื่องนึงให้เป็น IP ที่อยู่ในวง .50 ซะแล้ว share internet ด้วย proxy; เพื่อให้เครื่อง 192.168.10.12 มันสามารถออกเนตได้
เครื่อง ข จะเป็นเครื่องที่ทำตัวเองเป็น proxy เริ่มกันเลย
ติดตั้ง software tinyproxy ตัวนี้มีอยู่ใน universe repository อยู่แล้วครับ.
$sudo apt-get install tinyproxy
ทำการปรับแต่ง configuration ของ tinyproxy (ที่ใช้อยู่ตอนนี้คือ version 1.8.3-1)
$sudo vi /etc/tinyproxy.conf
คำค้นสำคัญๆที่เราสนใจ,ในเบื้องต้นนี้คือ
...
Port 8888 //ตัวนี้กำหนดว่า proxy เราจะใช้ port อะไร
...
...
Allow 127.0.0.1
#Allow 192.168.0.0/16
...
ให้เราแก้ไขเป็น,โดยเอา comment ออก
...
Allow 127.0.0.1
Allow 192.168.0.0/16
...
จัดการ save ที่เราแก้ไขเอาไว้
:wq
ทำการ restart tinyproxy service ซะหน่อย ให้มันอ่าน config ที่เราเพิ่งแก้ไขไป
$sudo service tinyproxy restart
Config Browser ที่เครื่อง ก.
เช่น Firefox ให้มาใช้งาน proxy ของเรา

ถ้าใช้งานได้ก็เป็นอันใช้ได้ :) แบบนี้

blog ต่อไปจะมาเล่าให้ฟังว่าทำให้มัน secure กว่านี้ได้อย่างไร (เรียกใช้ proxy ผ่าน SSH :) )
สถานการณ์ของผม
- มีเครื่อง ก: laptop/desktop เครื่องหนึ่งที่ออก internet ไม่ได้ อยู่วงแลนที่ไม่มี internet; สมมติว่า มี IP address เป็น 192.168.10.12
- ถ้าเครื่อง (ข) laptop/desktop ที่อยู่แลนอีกวงนึงจะสามารถออก internet ได้เลย; สมมติว่า มี IP address เป็น 192.168.50.12
ไอ้การที่จะเปลี่ยน IP ของเครื่องไปๆมาๆเพื่อออก internet นี่มันไม่สะดวกครับ ผมจึงคิดว่าทำเครื่องนึงให้เป็น IP ที่อยู่ในวง .50 ซะแล้ว share internet ด้วย proxy; เพื่อให้เครื่อง 192.168.10.12 มันสามารถออกเนตได้
เครื่อง ข จะเป็นเครื่องที่ทำตัวเองเป็น proxy เริ่มกันเลย
ติดตั้ง software tinyproxy ตัวนี้มีอยู่ใน universe repository อยู่แล้วครับ.
$sudo apt-get install tinyproxy
ทำการปรับแต่ง configuration ของ tinyproxy (ที่ใช้อยู่ตอนนี้คือ version 1.8.3-1)
$sudo vi /etc/tinyproxy.conf
คำค้นสำคัญๆที่เราสนใจ,ในเบื้องต้นนี้คือ
...
Port 8888 //ตัวนี้กำหนดว่า proxy เราจะใช้ port อะไร
...
...
Allow 127.0.0.1
#Allow 192.168.0.0/16
...
ให้เราแก้ไขเป็น,โดยเอา comment ออก
...
Allow 127.0.0.1
Allow 192.168.0.0/16
...
จัดการ save ที่เราแก้ไขเอาไว้
:wq
ทำการ restart tinyproxy service ซะหน่อย ให้มันอ่าน config ที่เราเพิ่งแก้ไขไป
$sudo service tinyproxy restart
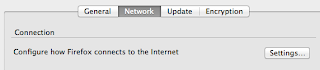
Config Browser ที่เครื่อง ก.
เช่น Firefox ให้มาใช้งาน proxy ของเรา


ถ้าใช้งานได้ก็เป็นอันใช้ได้ :) แบบนี้

blog ต่อไปจะมาเล่าให้ฟังว่าทำให้มัน secure กว่านี้ได้อย่างไร (เรียกใช้ proxy ผ่าน SSH :) )
วันศุกร์, ธันวาคม 21, 2555
Install Cairo Dock 3.1 in Ubuntu 12.10/12.04/Mint
To Install Cairo Dock, execute the following commands in the Terminal:
(one line at a time, enter then after command complete execute the next command line)
$sudo add-apt-repository ppa:cairo-dock-team/ppa
$sudo apt-get update
$sudo apt-get install cairo-dock cairo-dock-plug-ins
From: Install Cairo Dock 3.1 in Ubuntu 12.10/12.04/Mint (New Release)
'via Blog this'
(one line at a time, enter then after command complete execute the next command line)
$sudo add-apt-repository ppa:cairo-dock-team/ppa
$sudo apt-get update
$sudo apt-get install cairo-dock cairo-dock-plug-ins
From: Install Cairo Dock 3.1 in Ubuntu 12.10/12.04/Mint (New Release)
'via Blog this'
วันพุธ, ธันวาคม 19, 2555
Fixing Ubuntu theme Gnome Shell 3.6 metacity theme Bug (workaround)
Many thanx to reference source you made my day.
I just realize that the metacity theme (window decorator) from Gnome Cupertino did not applied when I use it, even though the theme maker already include metacity theme in his release.
This is because Gnome Shell 3.6 Bugs or they're changed without notice. The .themes folder that placed under user's home will not read by the system, so it will not change your window decorator theme.
Solution 1: we need to move those package to the system wide's themes folder; /usr/share/themes/
i.e.: /usr/share/themes/GnomeCupertino
Solution 2: make a themes folder under ~/.local/share/ then move that theme into this folder
i.e.: ~/.local/share/themes/GnomeCupertino
Note: With this solution the themes in this folder will not appear in the Gnome tweak tools.
Solution 3: make a symbolic link from ~/.themes to the ~/.local/share/
$ln -s ~/.themes ~/.local/share/themes
PS: Use Gnome Cupertino (gtk theme) with Zukitwo cupertino (gnome shell theme) is ROCK! ;)
Reference: http://www.fandigital.com/2012/10/use-custom-theme-in-gnome-shell-36.html
I just realize that the metacity theme (window decorator) from Gnome Cupertino did not applied when I use it, even though the theme maker already include metacity theme in his release.
This is because Gnome Shell 3.6 Bugs or they're changed without notice. The .themes folder that placed under user's home will not read by the system, so it will not change your window decorator theme.
Solution 1: we need to move those package to the system wide's themes folder; /usr/share/themes/
i.e.: /usr/share/themes/GnomeCupertino
Solution 2: make a themes folder under ~/.local/share/ then move that theme into this folder
i.e.: ~/.local/share/themes/GnomeCupertino
Note: With this solution the themes in this folder will not appear in the Gnome tweak tools.
Solution 3: make a symbolic link from ~/.themes to the ~/.local/share/
$ln -s ~/.themes ~/.local/share/themes
- Use the Gnome Tweak tools to select the theme you want
- Alt+F2 put r then Enter to refresh the changed.
PS: Use Gnome Cupertino (gtk theme) with Zukitwo cupertino (gnome shell theme) is ROCK! ;)
Reference: http://www.fandigital.com/2012/10/use-custom-theme-in-gnome-shell-36.html
วันพุธ, พฤศจิกายน 21, 2555
HOWTO Set Ubuntu proxy ignore-hosts via command line
Instead of use dconf-editor to change the gnome proxy setting (on Ubuntu 12.10) I managed to use command line. This is howto set proxy configuration via command line:
Put those lines into a shell scripts; make it executable ;)
Note: For the ignore-hosts value we need to use double quote around the bracket
This command line will not work:
gsettings set org.gnome.system.proxy ignore-hosts ['localhost', '127.0.0.0/8', '172.16.0.0/16','10.0.0.0/8']
This is the correct syntax:
gsettings set org.gnome.system.proxy ignore-hosts "['localhost', '127.0.0.0/8', '172.16.0.0/16','10.0.0.0/8']"
gsettings set org.gnome.system.proxy.http host '127.0.0.1'
gsettings set org.gnome.system.proxy autoconfig-url ''
gsettings set org.gnome.system.proxy ignore-hosts "['localhost', '127.0.0.0/8', '172.16.0.0/16','10.0.0.0/8']"
gsettings set org.gnome.system.proxy mode 'manual'
gsettings set org.gnome.system.proxy use-same-proxy false
gsettings set org.gnome.system.proxy.ftp host '127.0.0.1'
gsettings set org.gnome.system.proxy.ftp port 3128
gsettings set org.gnome.system.proxy.http authentication-password ''
gsettings set org.gnome.system.proxy.http authentication-user ''
gsettings set org.gnome.system.proxy.http enabled false
gsettings set org.gnome.system.proxy.http host '127.0.0.1'
gsettings set org.gnome.system.proxy.http port 3128
gsettings set org.gnome.system.proxy.http use-authentication false
gsettings set org.gnome.system.proxy.https host '127.0.0.1'
gsettings set org.gnome.system.proxy.https port 3128
gsettings set org.gnome.system.proxy.socks host '127.0.0.1'
gsettings set org.gnome.system.proxy.socks port 8010
Put those lines into a shell scripts; make it executable ;)
Note: For the ignore-hosts value we need to use double quote around the bracket
This command line will not work:
gsettings set org.gnome.system.proxy ignore-hosts ['localhost', '127.0.0.0/8', '172.16.0.0/16','10.0.0.0/8']
This is the correct syntax:
gsettings set org.gnome.system.proxy ignore-hosts "['localhost', '127.0.0.0/8', '172.16.0.0/16','10.0.0.0/8']"
วันพฤหัสบดี, พฤศจิกายน 15, 2555
Ubuntu: Solving conky did not display on gnome-shell 3.6
Conky, conky lua script that dowloaded from gnome-look did not display any graphics on gnome-shell.
To fix; we need to edit the Conky's config file a.k.a. .conkyrc file
Replace own_window_type override with following lines:
own_window_type normal
...
You might add this line if your script did not have it.
own_window_argb_visual yes
...
Finish? then
killall conky
then execute conky again, now it should display the graphics
Reference: http://askubuntu.com/a/139867
Bonus, nice conky theme
- http://www.unixmen.com/conky_5-and-conky_2-another-2-nice-themes-for-conky/
- http://www.unixmen.com/configure-conky-lua-in-ubuntu-11-10-12-04-fedora-debian-and-linuxmint-howto-conky/
วันศุกร์, พฤศจิกายน 02, 2555
Ubuntu, 12.10, gnome-shell; Move window buttons back to the left side
HOWTO move the window buttons in gnome-shell to the left side
I love the Ubuntu button on the left side but after install&setup the 12.10, they move the buttons back to the right.
So, I searching/googling I use gnome-shell and the gconf method didnot work anymore I know I have to user dconf editor.
There's many many more, but use same command and it did not work on my machine.
Just excute this command in a terminal
$gsettings set org.gnome.desktop.wm.preferences button-layout close,maximiez,minimize:
Or use dconf editor; Well, install the dconf editor.
$sudo apt-get install dconf-tools
Open it go to/navigate to org/gnome/desktop/wm/preferences, change the value of button-layout to :minimize,maximize,close
If you're like mine it will not work! buttons still there, on the right did not moved :(
Here's how
navigate to this instead: org/gnome/shell/overrides/ change the value of button-layout to :minimize,maximize,close
 |
| button are now on the left side |
Gotcha! I'm a happy man now :) Have a good day!
วันจันทร์, ตุลาคม 01, 2555
Ubuntu: change eth1 or eth* to eth0
Running Ubuntu in the VM machine. There's quite a lot of time when we change its MAC address. The Ubuntu will generate the new eth for new network device (new MAC).
Anyway I already have attach 1 NIC to a VM and I want to change eth1 to eth0. Here's the HOWTO
Edit the content of the file /etc/udev/rules.d/70-persistent-net.rules
#sudo vi /etc/udev/rules.d/70-persistent-net.rules
I just comment the old line/the line that had "eth0" then change eth1 to eth0 in another line. Save changed. We need to reboot the machine.
reference: http://www.caeus.com/articles/how-to-change-which-network-card-eth0-vs-eth1-etc-your-ubuntu-server-uses/
วันพุธ, สิงหาคม 15, 2555
Join the Ubuntu desktop into the LDAP (Active Directory)
HOWTO join Ubuntu desktop into Domain server, LDAP
Scenerio:
1. Check the /etc/resolv.conf
i.e.
$cat /etc/resolv.conf
search test.org
nameserver 127.0.0.1
If your result like mine,above. We should modify it, to point it to your real nameserver.
i.e.
search test.org
nameserver 172.16.0.6
2. Install likewiseopen, the openldap software
i.e.
$sudo apt-get install likewise-open5
Scenerio:
- LDAP server is Microsoft Active Directory
- Ubuntu desktop, Ubuntu 12.04 Precise
1. Check the /etc/resolv.conf
i.e.
$cat /etc/resolv.conf
search test.org
nameserver 127.0.0.1
If your result like mine,above. We should modify it, to point it to your real nameserver.
i.e.
search test.org
nameserver 172.16.0.6
2. Install likewiseopen, the openldap software
i.e.
$sudo apt-get install likewise-open5
** Note that there's likewise-open5 and likewise-open; must install the one that have 5, otherwise it will not work, cannot join the domain. Anyway the likewise-open is the dependency of likewise-open5, it will installed along with the 5 one.
3. a command to join a domain
i.e.
$sudo domainjoin-cli join test.org Administrator
3. a command to join a domain
i.e.
$sudo domainjoin-cli join test.org Administrator
* The Administrator should be changed to your account instead.
4. Modification needed to make domain user can invoke the sudo command
Edit the /etc/sudoers. you can add this line at the last line or below the existing one.
i.e
$sudo vi /etc/sudoers
...
%test.org\\domain^users ALL=(ALL) ALL
...
* The test.org should be changed to your AD, domain name instead.
** (see Adding sudo)
5. Enable the (lightdm) login for a new LDAP account. Otherwise there's noway to login as an LDAP user on this machine.
i.e.
Make a backup of original file.
$sudo cp -p /etc/lightdm/lightdm.conf /etc/lightdm/lightdm.conf.orig
$sudo /usr/lib/lightdm/lightdm-set-defaults -m true
$sudo /etc/init.d/lightdm restart
Reboot the machine OR logout to login as an LDAP user.
Now, next time you can select Other, on login screen to login as an LDAP user.
Reference:
- https://help.ubuntu.com/community/LikewiseOpen
- http://www.tejasbarot.com/2012/04/30/howto-other-login-option-on-login-screen-ubuntu-12-04-lts-precise-pangolin/
- http://manyrootsofallevilrants.blogspot.co.uk/2012/05/ssh-single-sign-on-sso-for-ubuntu-1204.html
วันพุธ, มิถุนายน 13, 2555
Ubuntu on SSD; application tuning for best performance
Ubuntu on SSD
Tuning application's cache/temp directory for best performance.
From previous post running-ubuntu-on-ssd-tweak. We already have instruction on howto move Firefox's cache to RAM, the tmpfs. This post will show howto do it with others.
Google Chrome
Change execute parameter in Google Chrome launcher file.
$sudo vi /usr/share/applications/google-chrome.desktop
...
# Exec=/opt/google/chrome/google-chrome %UExec=/opt/google/chrome/google-chrome --disk-cache-dir="/tmp/" %U
...
duplicate old line then comment it. put additional parameter to a duplicated line; --disk-cache-dir="/tmp/"
If you want to specify the cache size see the reference.
reference:
- http://www.ghacks.net/2010/10/19/how-to-change-google-chromes-cache-location-and-size/
- http://www.joeyconway.com/blog/2011/09/11/ubuntu-ssd-move-chrome-cache-to-ram/
Running Ubuntu on SSD; tweak & configuration for best performance
Ubuntu on SSD
tweak & configuration for best performance
Start with 1st, 2nd reference (1, 2)
Modify the /etc/fstab & I/O scheduler
# <file system> <mount point> <type> <options> <dump> <pass>
proc /proc proc nodev,noexec,nosuid 0 0
tmpfs /tmp tmpfs nodev,nosuid,noatime,mode=1777 0 0
# / was on /dev/sda1 during installation
UUID=338c2a9f-8a5f-4e4e-90c5-30d02a7680c5 / ext4 defaults,noatime,discard,errors=remount-ro 0 1
# /home was on /dev/sdb5 during installation
UUID=68f602b9-5384-4be2-8b7a-cbc1001504d2 /home ext4 defaults 0 2
# swap was on /dev/sda5 during installation
# ram 8G no need swap
# UUID=2b531fb1-b9fc-4653-859a-58af74951a2c none swap sw 0 0
Automatic TRIM (3)
is supported since kernel 2.6.33 with the EXT4 file system
For automatic TRIM to work, the drive needs to be mounted with the "discard" option in fstab.
For automatic TRIM to work, the drive needs to be mounted with the "discard" option in fstab.
...
# / was on /dev/sda1 during installation
UUID=338c2a9f-8a5f-4e4e-90c5-30d02a7680c5 / ext4 defaults,noatime,discard,errors=remount-ro 0 1
UUID=338c2a9f-8a5f-4e4e-90c5-30d02a7680c5 / ext4 defaults,noatime,discard,errors=remount-ro 0 1
...
Modify /etc/rc.local (1, 2)
...
echo deadline > /sys/block/sda/queue/scheduler
echo 1 > /sys/block/sda/queue/iosched/fifo_batch
...
exit 0
Modify applications (4)
Firefox puts its cache in your home partition. By moving this cache in RAM you can speed up Firefox and reduce disk writes. Complete the previous tweak to mount /tmp in RAM, and you can put the cache there as well.
Open about:config in Firefox. Right click in an open area and create a new string value called browser.cache.disk.parent_directory. Set the value to /tmp.
Open about:config in Firefox. Right click in an open area and create a new string value called browser.cache.disk.parent_directory. Set the value to /tmp.
reference:
- http://askubuntu.com/a/86474
- http://itezer.com/blog/ubuntu-linux/125-four-tweaks-for-using-ubuntu-with-ssd.html
- TRIM http://askubuntu.com/questions/18903/how-to-enable-trim
- http://tombuntu.com/index.php/2008/09/04/four-tweaks-for-using-linux-with-solid-state-drives/
วันอังคาร, พฤษภาคม 08, 2555
Ubuntu file manager context extension (nautilus script)
I want to right click then excute the terminal from that current directory. It's long time ago, I know there's a way to do this. So, this is the ;)
$cd ~/.gnome2/nautilus-scripts/
~/.gnome2/nautilus-scripts$ls -l
total 0
Then if we right click on the nautilus there's a 'script' context menu and there's 2 script under it DONE! ;)
The HOWTO I got it from NautilusScriptsHowto.
There're more (nautilus) scripts from this URL.
- create this folder if it's not existed ~/.gnome2/nautilus-scripts
(or /home/<your account>/.gnome2/nautilus-scripts) - Put the wanted script beneath it.
$cd ~/.gnome2/nautilus-scripts/
~/.gnome2/nautilus-scripts$ls -l
total 0
~/.gnome2/nautilus-scripts$ cp ~/script/nautilus_Open_terminal_here.txt .
~/.gnome2/nautilus-scripts$ cp ~/script/root-nautilus-here.txt .
~/.gnome2/nautilus-scripts$ mv nautilus_Open_terminal_here.txt Open-terminal-here
~/.gnome2/nautilus-scripts$ mv root-nautilus-here.txt root-nautilus-here
~/.gnome2/nautilus-scripts$ chmod +x *
Then if we right click on the nautilus there's a 'script' context menu and there's 2 script under it DONE! ;)
The HOWTO I got it from NautilusScriptsHowto.
There're more (nautilus) scripts from this URL.
วันพุธ, มีนาคม 21, 2555
Ubuntu: New Pidgin icon Faenza style
I want to replace Pidgin icon original from Faenza icon package, don't like the smili face icon :P

So, I googling then found this icon
Very impressed.
But creator provide just a svg image. so I decide to make the others icon dimension, according to the Faenza package.

Download here
(pidgin_apps_icon.tar.gz md5: b2dda311a6f34958d2781dc302c05a27)
How to use?
Just replace the pidgin.png under following folder with the corresponding pidgin.XX.png from downloaded file.
So, I googling then found this icon
 |
| Thank you http://gnome-look.org/content/show.php/?content=133153 |
Very impressed.
But creator provide just a svg image. so I decide to make the others icon dimension, according to the Faenza package.

Download here
(pidgin_apps_icon.tar.gz md5: b2dda311a6f34958d2781dc302c05a27)
How to use?
Just replace the pidgin.png under following folder with the corresponding pidgin.XX.png from downloaded file.
- .. /Faenza/apps/16/pidgin.png
- .. /Faenza/apps/22/pidgin.png
- .. /Faenza/apps/48/pidgin.png
- .. /Faenza/apps/32/pidgin.png
- .. /Faenza/apps/64/pidgin.png
- .. /Faenza/apps/96/pidgin.png
- .. /Faenza/apps/scalable/pidgin.svg
วันอาทิตย์, มกราคม 29, 2555
Ubuntu: 11.10 x64 - Change Firefox JRE plugin from IcedTea to Sun JRE
To Change Firefox java plugin from IcedTeaWeb to Sun JRE on Ubuntu 11.10
execute at terminal to install java plugin for Firefox
$sudo apt-get install icedtea-7-plugin
If you want to change JRE from icedtea java to Sun JRE do this
Put following command
$cd /etc/alternatives/$sudo mv mozilla-javaplugin.so mozilla-javaplugin.ori.so
$sudo ln -s /usr/lib/jvm/jdk1.6.0_26/jre/lib/amd64/libnpjp2.so mozilla-javaplugin.so
To check, what we had changed applied.
$ls -l moz*
lrwxrwxrwx 1 root root 58 2012-01-21 01:38 mozilla-flashplugin -> /var/lib/flashplugin-installer/npwrapper.libflashplayer.so
lrwxrwxrwx 1 root root 58 2012-01-21 01:38 mozilla-javaplugin.ori.so -> /usr/lib/jvm/java-6-openjdk/jre/lib/amd64/IcedTeaPlugin.so
lrwxrwxrwx 1 root root 50 2012-01-29 01:38 mozilla-javaplugin.so -> /usr/lib/jvm/jdk1.6.0_26/jre/lib/amd64/libnpjp2.so
วันอังคาร, มกราคม 24, 2555
Ubuntu: reconfig keyboard layout in Ubuntu server
Reconfig keyboard layout in Ubuntu server
sudo dpkg-reconfigure console-setup
sudo dpkg-reconfigure console-setup
Ubuntu: Add permanent static routes
To keep the Static Route persistent or you want to add the route entries to the network script files (not using the route command) then all you need to do is to edit the file
/etc/network/interfacesand the static routes in the following format:
up route add [-net|-host] <host/net>/<mask> gw <host/IP> dev <Interface>
sudo cat /etc/network/interfaces
The output should show something like this
** updated 20120702
from: http://www.cyberciti.biz/faq/setting-up-an-network-interfaces-file/
Sample:
You need to insert the dns as follows:
dns-nameservers 192.168.3.45 192.168.8.10
dns-search foo.org bar.com
For the change to /etc/network/interface to take effect. please restart the “networking” service as follows:
sudo /etc/init.d/networking restart
/etc/network/interfacesand the static routes in the following format:
up route add [-net|-host] <host/net>/<mask> gw <host/IP> dev <Interface>
sudo cat /etc/network/interfaces
The output should show something like this
# This file describes the network interfaces available on your system
# and how to activate them. For more information, see interfaces(5).
# The loopback network interface
auto lo
iface lo inet loopback
# The primary network interface
auto eth0
iface eth0 inet static
address 172.20.10.1
netmask 255.255.255.0
broadcast 172.20.10.255
gateway 172.20.10.254
# and how to activate them. For more information, see interfaces(5).
# The loopback network interface
auto lo
iface lo inet loopback
# The primary network interface
auto eth0
iface eth0 inet static
address 172.20.10.1
netmask 255.255.255.0
broadcast 172.20.10.255
gateway 172.20.10.254
# static route
up route add -net 172.20.11.0/16 gw 172.20.10.254 dev eth0
up route add -net 172.20.11.0/16 gw 172.20.10.254 dev eth0
** updated 20120702
from: http://www.cyberciti.biz/faq/setting-up-an-network-interfaces-file/
Sample:
You need to insert the dns as follows:
dns-nameservers 192.168.3.45 192.168.8.10
dns-search foo.org bar.com
For the change to /etc/network/interface to take effect. please restart the “networking” service as follows:
sudo /etc/init.d/networking restart
ref: http://www.ubuntugeek.com/howto-add-permanent-static-routes-in-ubuntu.html
วันอาทิตย์, มกราคม 22, 2555
Ubuntu: Android development setup resources
To setup Ubuntu desktop ready for Android development
Eclipse SDK
Eclipse Classic 3.7.1 http://www.eclipse.org/downloads/
Android SDK
Download http://developer.android.com/sdk/index.html
Installing http://developer.android.com/sdk/installing.html
Android ADT
http://developer.android.com/sdk/eclipse-adt.html
Optional
Subclipse (Subversion plugin for eclipse)http://subclipse.tigris.org/servlets/ProjectProcess?pageID=p4wYuA
Eclipse update site URL: http://subclipse.tigris.org/update_1.6.x
Ubuntu: Got an error libncurses.so.5 wrong ELF class when execute adb
Got an error libncurses.so.5 wrong ELF class when execute adb
when execute adb, got an error like this
#: adb
adb: error while loading shared libraries: libncurses.so.5: wrong ELF class: ELFCLASS64
Solution
Install ia32-libs to the system
sudo apt-get install ia32-libs
Refer to Google documentation here
http://developer.android.com/sdk/installing.html#troubleshooting
Ubuntu: Install javaHL for Subclipse, Eclipse plugin
When starting eclipse after install subclipse plugin. Got an error like this
Failed to load JavaHL Library. These are the errors that were encountered: no libsvnjavahl-1 in java.library.path no svnjavahl-1 in java.library.path no svnjavahl in java.library.path
means that we did not install some library files for subversion plugin yet.
Execute this command:
sudo apt-get install subversion libsvn1 libsvn-java
(re)Start the eclipse there's (should) no such an error occurred.
สมัครสมาชิก:
บทความ
(
Atom
)